Toolbars
One
of the many new features available in version
5 is the ability to create and modify toolbars
within the ESC software. A toolbar is a collection
of icons (pictures) and words that represent
shortcuts to various screens and reports in
the software. By creating custom toolbars
for your employees you can make it easier
for them to use the ESC software.
Just
think you can now put all the reports you
use on a regular basis in one simple pull-down
menu. Want direct access to the Receive Inventory
screen? You can create a toolbar that enables
you to jump right to it with a single click.
Do you have employees that don’t need
access to Sales Invoicing? Modify our default
toolbar and remove the icon that takes you
there (and setup your security properly, but
that is a lesson for another day). You can
do all these things and more with just a little
time and the information below.
In
this article I will show you how to create
a new toolbar for your purchasing agent. Don’t
have one? Don’t fret. This example will
cover just about everything you need to know
about toolbars including how to return to
the system defaults if you don’t need
this particular toolbar.
Before
we dive in let me explain one important fact
about toolbars. Custom toolbars are only visible
on the computer where they are created. So
before we get started you might want to go
to the computer your purchasing agent uses.
If you don’t have a purchasing agent
or are just in this for the knowledge, any
computer will do.
The
first step in creating a new toolbar is to
right-click on any part of the toolbar which
is visible. This will include the area at
the top of your screen where the pull-down
menus and default icons are. This will display
a menu that will show all of the toolbars
on this computer and a customize option. Select
Customize and the following window will appear.
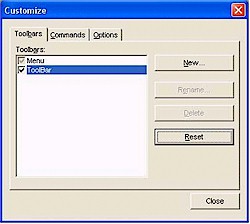
To
create a new toolbar, click the New button
and enter Purchasing in the resulting Toolbar
Name field. Click OK and you will see that
a new blank toolbar will appear under your
existing toolbar.
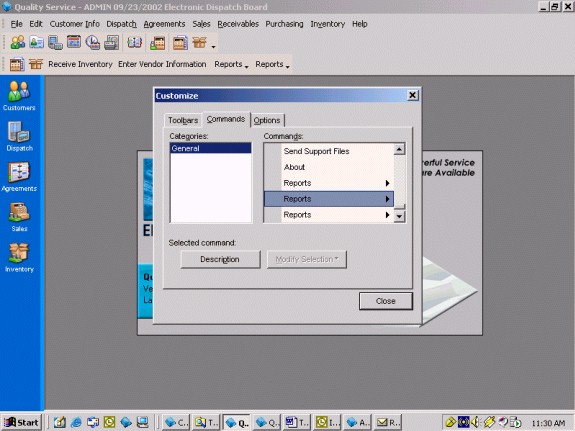
Next,
click on the Commands tab to see a list of
the items you can place on your toolbar. Select
the following items and drag them to the blank
toolbar from left to right.
The toolbar should look something like this
when you have completed this step:
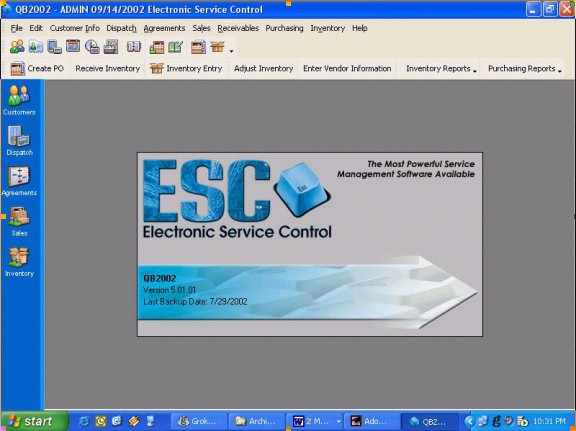
Right-click
on the first icon and change the name in the
Name field from
Enter Purchase Orders to Create PO. Then select
Image and Text.
Use
this concept on the remaining items to achieve
something similar to the toolbar shown below.
Helpful
Hint: You can rearrange your icons by clicking
an icon and dragging it to its new location.
You will have to use this feature to get the
Receive Inventory item in the right place.
Another
Hint: Use the Begin a Group menu item to create
a separator bar between the currently highlighted
item and the item to its left.
Now
use these techniques to create your own toolbars.
Feel free to experiment. Try dragging the
toolbars to another edge of the screen and
back. If you are feeling particularly adventuresome,
try changing the contents and order of the
items that appear in the Purchasing toolbar
under the Inventory Reports pull-down menu.
If
you make a mistake, you can always delete
your custom toolbars and go back to our defaults
by selecting Edit | Reset Toolbars to Default.
Have
fun customizing the software!